
Changing the front discs and pads is a routine task for anyone who maintains their own car, but if you
have never done it, this guide will hopefully show you what’s involved. My car is automatic, and as they are “heavier” on the brakes, as you don’t get any engine braking from the gearbox, like a manual, you will find that you will most likely change your pads more often.
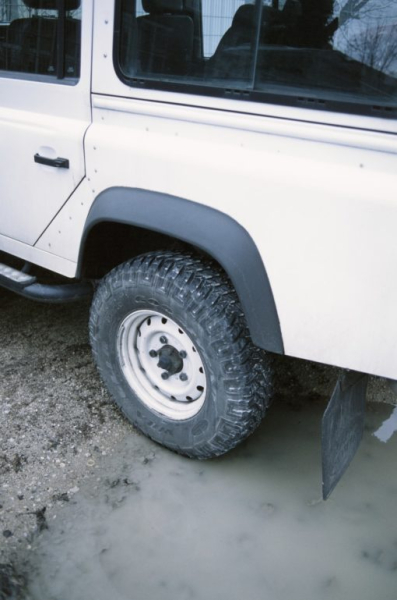
After a recent weekend trip, my car began to suffer brake fade during a long descent, so it was most likely that worn discs and pads would have contributed to this. I had noticed the pads were low at a recent tyre change. My discs also had quite a lip on the edge as well, so I chose to renew them at the same time. The lip on my discs was quite significant, and I could see they needed changing just from my experience working on cars. The minimum
thickness for the front discs should be as follows:-
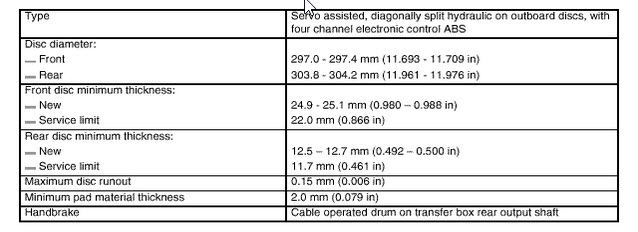
I measured my discs once they were off, and mine were
down to 20.2 mm, so as you can see from the above table, they definitely
needed doing!!!

Obviously, you can measure the disc when still on the car
to see if they need to do it or not.
There are many suppliers of Discs and
pads for the Discovery 2. Obviously, you could go to a Local Dealer and buy
them there. They will be about the most expensive you could buy, but you
know they will do the job. There are also “performance” discs around, including drilled and slotted discs from manufacturers like EBC.
For road use, these discs can improve
braking performance no end on the Discovery as it is a heavy old truck to
bring to a halt. However, “if” you take your truck off the road in the mud on
regular occasions, slotted and drilled discs “can” fill up with mud and
muck and you could damage the disc face when braking. For this reason, I
chose to use Mintex’s standard vented discs. They are probably an improvement over “genuine” discs, but not at the premium cost.
First of all, loosen the wheel nuts,
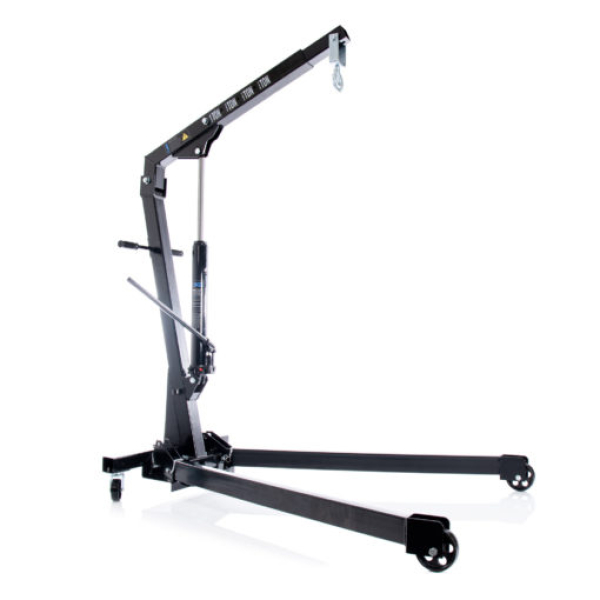
then jack up one side of the car and support it on an axle stand. It’s okay to leave the jack with the weight on, but put an axle stand in place just
in case the jack fails. I would STRONGLY advise you use a trolley jack to
support the car, its far more stable than the factory bottle jack supplied
Once the car is up, remove the wheel.
The brake disc is held in place with a countersunk screw. These screws
EASILY get chewed up and therefore are a pain to remove, for this reason I
had bought new ones in preparation for doing the Job. The screw part
numbers are SF108201L and are only 0.45 p each. If yours come out,
then great carry on. It was a good job
I had new ones because I started on the drivers side and the screw was
pooped!!. So then you have to drill them out.
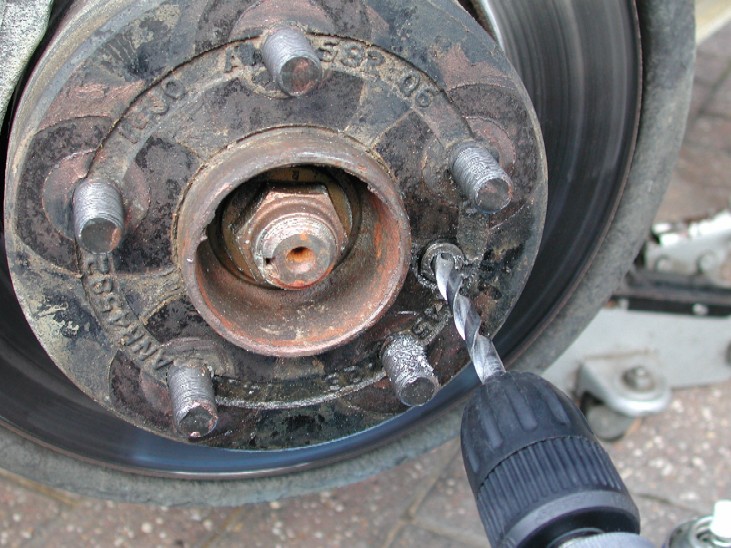
There are 2 ways to do this: 1. You
drill the head of the screw and wait till the disc is off and remove
the rest then, or 2. If you’re used to using them, drill down the centre of
the screw and use a screw extractor to remove it. I chose this time to
drill the head off. After almost getting through, the drill actually “bit”
into the screw, and as I reversed the drill to free it off, the screw came
undone!!
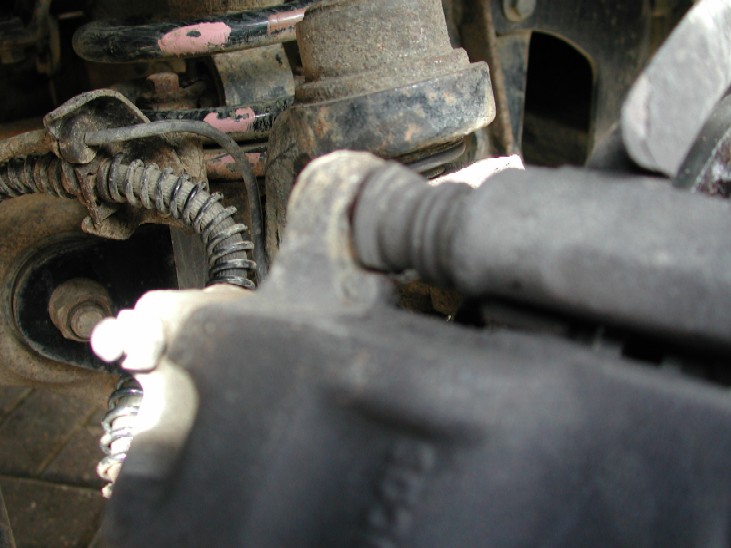
Next, you have to remove the calliper retaining bolts. These are also the “sliders” that the calliper moves in
and out on. There are 2 of them, 1 at the top and 1 at the bottom. Both are
12mm.
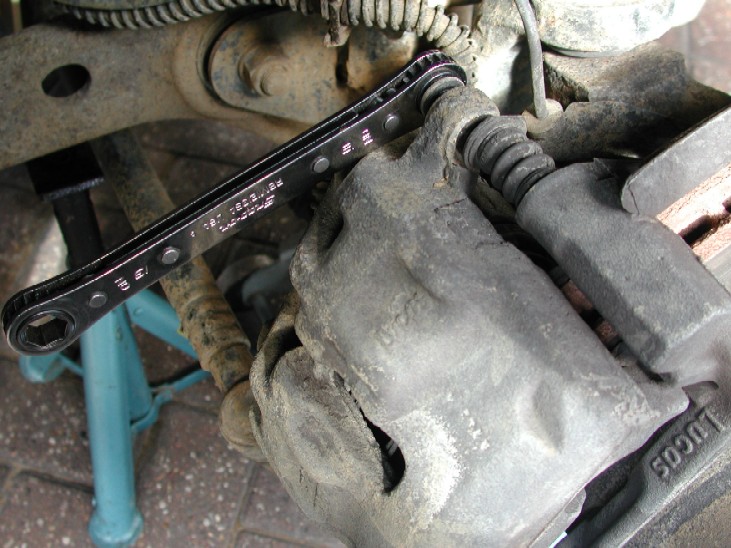
Once those bolts are out, you can remove the calliper out
the way, Be careful not to “stress” the brake pipe, so don’t let the
caliper “hang” on the pipe, it will quite happily sit on the track rod out
the way.
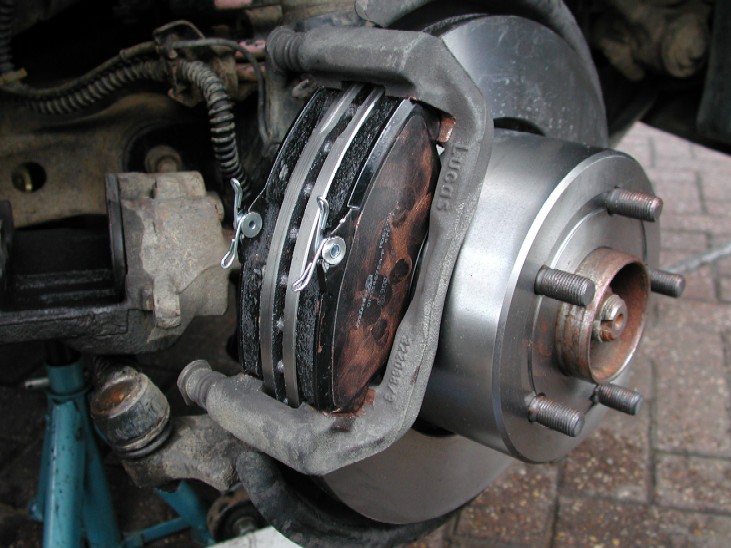
This now reveals the pads. They can now be simply
removed and thrown away.
“If” you’re just changing the pads, clean the calliper and
pad retainer of brake dust using a brake cleaner spray, or even car
washing stuff with an “old” stiff brush will do as well. AVOID breathing
in brake dust, as it is very hazardous to your health !!!. REFER
further down this article in the refit section for torque settings of the
calliper bolts, etc.
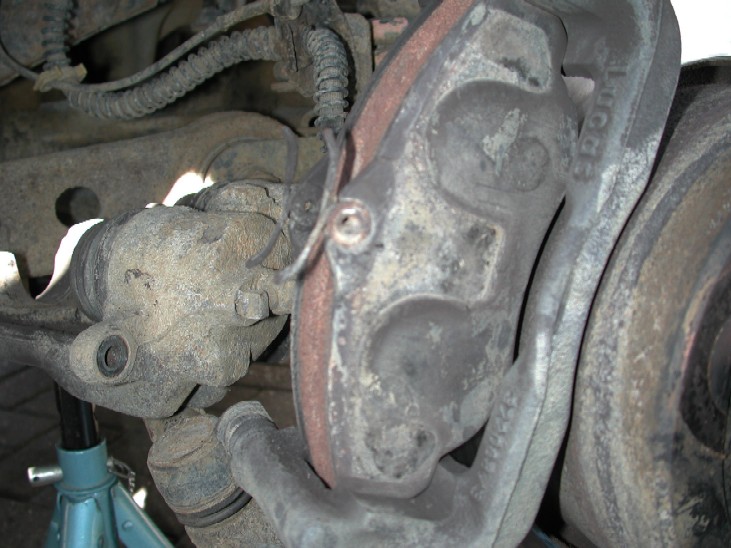
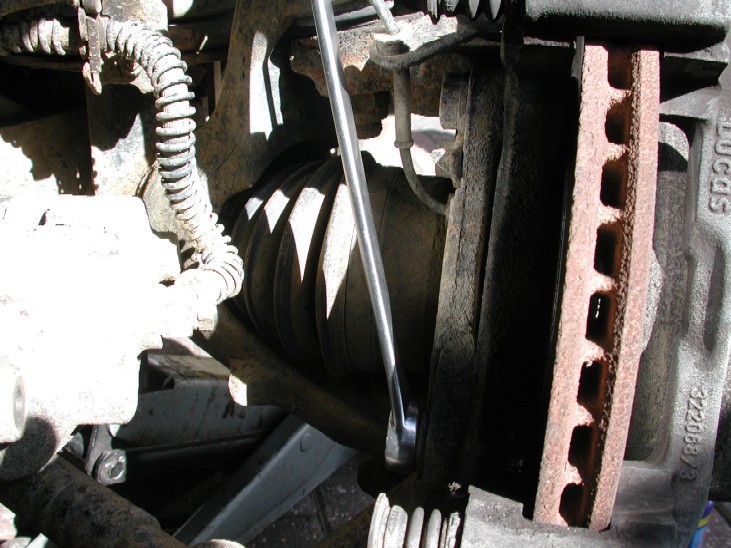
You must remove the rest of the calliper if you also change the discs. This again has 2 bolts, 1 at the top and 1
at the bottom. They are both 19mm and amazingly 12-point bolts. You will
find it easier on the top bolt to unclip the ABS wire carefully from its
retainer. This will give you more room for a socket and ratchet to get on
the top bolt.
Give the carrier assy a good clean of brake dust etc.
Make sure all the water is gone from the holes before re-fitting it. Check
that the rubber boots on the sliders are in good condition and that the sliders move
in and out freely.
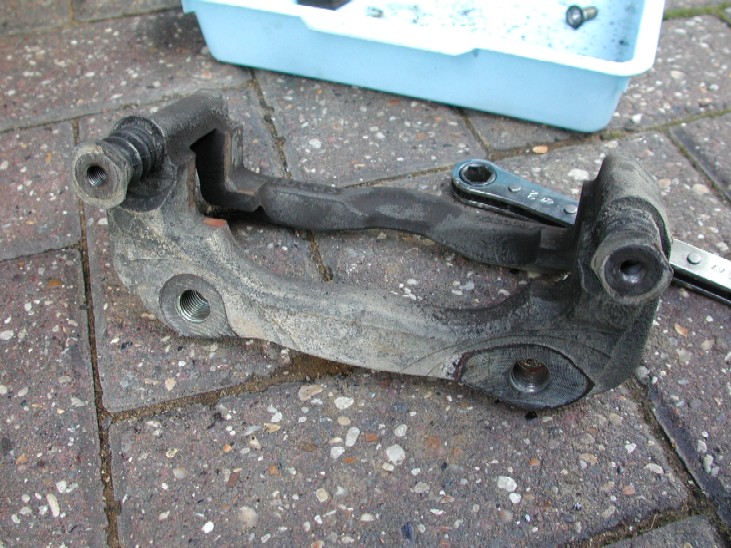
Give the machined areas, and the ends of the
sliders a small smear of copper grease ready for re-fitting. NOTE the
“flats” on the sliders. These hold the sliders from spinning when you
re-fit the bolts back in
Now that the carrier is off,
you can “if you lucky” just wiggle the disc from the
hub. My driver’s side disc came off easily. The passenger side, which
experiences heavier braking due to a right-hand drive vehicle, needed some
“gentle” persuasion with a large block of wood and a club hammer. To aid
in getting off the passenger side, I needed to rotate the disc to hit it all
the way around, as it’s only exposed a little because of the mud shield.
NOTE!!! To rotate it, you must put the vehicle in neutral, ensure
it is chocked, and the handbrake is on !!!
Once the disc is off, clean the mating surface where it
sits on any dirt and rusty/flaky metal hub. Once it’s clean, give
it a small smear of copper grease where the disc meets the hub.
While the disc was off, I also took the opportunity
to clean the mud shield, hub, and the general area of mud and
brake dust, which was there from my last off-road experience. I also
ensured the ABS wheel speed sensor was secure and the wires looked good
and intact.
Also, give the hub a good clean where the alloy wheels
fit on, then re-apply a small smear of grease all the way
around.
Now you’re ready to refit the new discs and pads. Fit the
new disc into position and secure it with one of the new screws. Tighten
the screw to 10 Lbs ft. If you don’t have a torque wrench, just “nip” it
up. Use some brake cleaner or solvent to clean the “factory” oil off the
disc that is used to coat it against corrosion
Once the disc is on, you can refit the carrier assy back
to the hub. Tighten the 2 19mm bolts to 175 NM or 129 Lbs Ft. Ref-fit the
If you removed the ABS sensor wire back into its retainer earlier for more
access to the top bolt.
Grease the edges of the new pads where they slide on the
calliper with some more copper grease. Also, add some grease to the backs of
the pads where the calliper and piston push it and where the pad
sits / slides on the calliper.
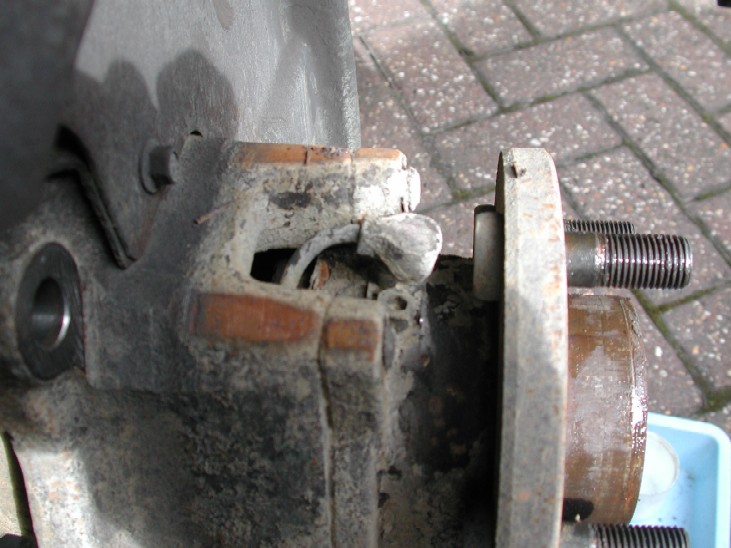
Below is the carrier assy, pads and disc re-installed.
You can see the areas where copper grease should be applied. NOTE !! Avoid getting ANY grease on the disc or friction surface of the pad at all costs!
Now, to refit the calliper back on, you will have to “push”
The pistons return to the calliper, allowing it to go over the new thicker
pads and disc. Some cars need a special tool to wind the piston back as it
rotates on a coarse thread. The Land Rover pistons simply go in and
out.
Before you push the pistons back, remove the cap off the brake
reservoir to allow the fluid to be returned to the reservoir.
NOTE !! If you have topped up your brake fluid to
the max mark recently and have worn pads, you will overflow the
reservoir, so keep an eye on the fluid level as you push the pistons back
into the calliper. If the fluid gets too high, you will need to remove some,
use a syringe or similar tool, but be careful not to get
any dirt into the reservoir AND don’t let any fluid come into contact with
your vehicle paintwork. You may find the reservoir will not get too full
until you do the second side.
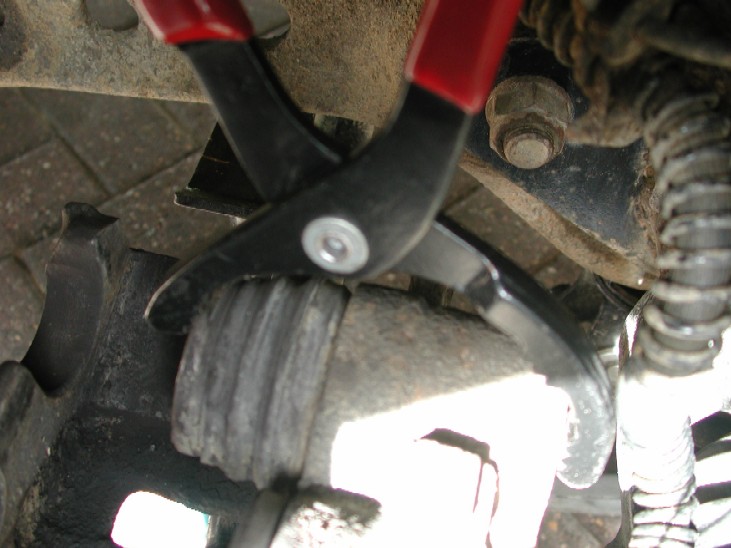
To push the pistons back, you can use a large pair of
“swan” neck pliers, a g-clamp or anything that gives a constant push. I
used my oil filter pliers, which open very wide and grip well.
AVOID at all costs any damage to the piston seals!! A
constant pressure on the push is better than a quick squeeze. Because it
has 2 pistons, one may start to come out again as they both
get nearly fully closed, but work each one a little at a time. They
are fully in when the rubber seal shows no more ribs.
Once the pistons are fully retracted, refit the calliper over the new pads. You may have to squeeze the sliders a little to get it into position. Once it’s in position, make sure the “flats” on the
sliders are sitting correctly against the calliper, refit the bolts and
tighten to 30 NM or 22 LBS ft
Once the calliper is back on, give the brake pedal a few
pushes to “seat” the pistons back up against the pads. I took the
opportunity to clean the insides of the alloy wheels and then apply a
a small smear of copper grease to where the alloy wheel meets the brake disc
surface.
Refit the road wheel and tighten the wheel
nuts by hand. Remove your axle stand and lower the vehicle off the jack,
then torque the wheel nuts to 140 NM or 103 LBS ft, and you’re done!!
Now repeat the task on the other side!!! Remember, the
brake fluid level goes up when the pistons are retracting. Once you have done
both sides, check the fluid level is at the max mark.
When all is complete, take the car for a small test
drive and try to avoid “heavy” braking for approximately 100 miles to allow
the brakes to “bed in.”